The Android Studio build system is based on Gradle, and the Android Gradle plugin adds several features that are specific to building Android apps.

Although the Android plugin is typically updated in lock-step with Android Studio, the plugin (and the rest of the Gradle system) can run independent of Android Studio and be updated separately. For the best performance, you should use the latest possible version of both Gradle and the plugin. When you update Android Studio, you may receive a prompt to automatically update the Android Gradle plugin to the latest available version. You can choose to accept the update or manually specify a version based on your project’s build requirements.
In this article, we are going to discuss both methods.
So, let’s dive into the four different ways in which Gradle can be updated.
Different Ways To Update Gradle
Method 1
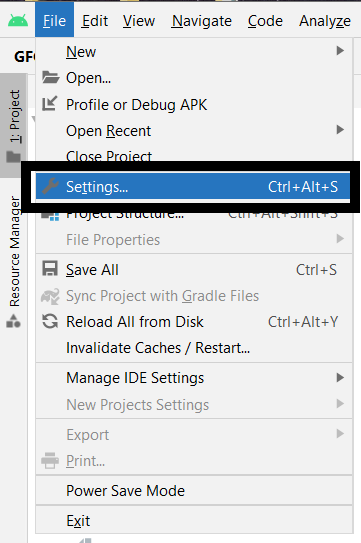
Step 1: Open Android Studio and navigate to File → Settings.
Step 3: Selecting desired Gradle version.
Step 4: Go to File → Project Structure
Step 5: Then click on the Project option.
then choose the latest version of Gradle. After that click on Ok.
Latest stable versions you can use with Android Studio 4.3.0 (Oct 2021):
Android Gradle Plugin version: 7.0 Gradle version: 7.0
Method 2
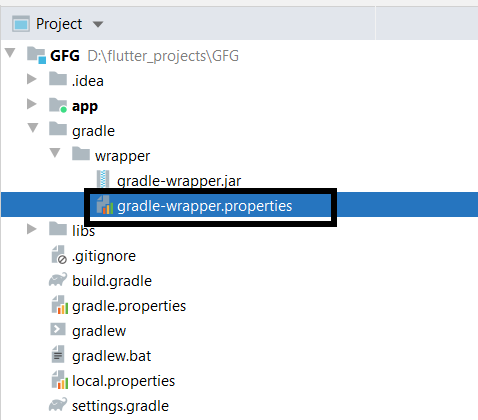
Step 1: Open gradle-wrapper.properties(go to Gradle > wrapper > gradle- wrapper.properties)
Step 2: manually change the distributionUrl property in the file.
Method 3
Step 1: Grab latest version supported by Android Studio: http://www.gradle.org/downloads (Currently 1.9, 1.10 is NOT supported by AS yet)
Step 2: Install: Unzip to anywhere like near where AS is installed: C:\Users[username]\gradle-1.9\
Step 3: Then navigate to File -> Settings
Step 4: Then click on Gradle -> Service directory path: (Change to folder you set above) -> Click ok. The status on the bottom should indicate it’s busy & the error should be fixed. Might have to restart.
Method 4
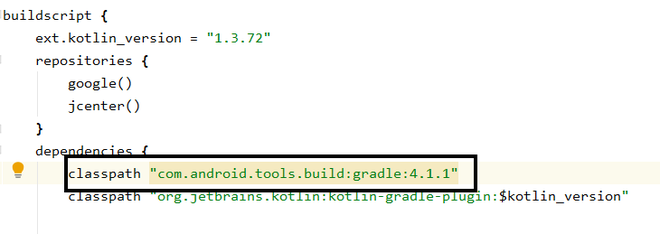
Step 1: Go to project-level build.gradle file
Step 2: You can manually, change version of gradle to latest, just type classpath‘com.android.tools.build:gradle:x.x.x’.
Step 3: Put the latest version in place of x.x.x inside dependencies as shown below.